This is probably one of the easiest home sewing projects you will attempt. It's great if you've always wanted to start sewing but weren't quite sure where to start. The best part about making an envelope pillow case is how easy it is to remove and wash it. Or better yet, how easy it is to remove and replace with a new cover when you want a new look. Okay, lets get started.
Recently I followed this method to make an 18" pillow but the instructions are easy to adapt to any size pillow. Here's all the math you need to know. Measure the width of your pillow and add one inch for the seam allowance. Then measure the length of your pillow and multiply that number 2.5; you do not have to add additional length for the seam allowance. So for an 18"x18" pillow I needed a piece of fabric that is 19" wide by 45" long.
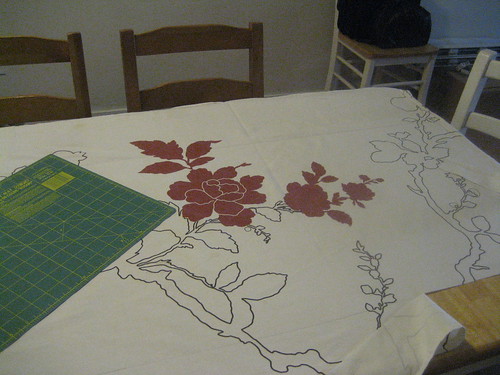
 This this little project was a great opportunity for me to recycle some fabric. I had purchased a lovely dwell tablecloth from target a few months ago that we managed to abundantly stain. Luckily I was able to get enough unstained fabric out of the tablecloth to make two pillows. This worked out great because I really did love the tablecloth before we got olive oil ALL over it.
Once you have your piece of fabric cut out turn it right side down. Fold over the edge of the fabric on each of the shorter sides (for me this was the 19" long sides of the fabric) and press. The fact that ironing is involved in every sewing project you do was once my least favorite part about it and I would avoid that step whenever possible. I have finally grown to realize that it really makes your life a million times easier so now I suck it up, turn on some great tunes and iron away. Once you have your two sides pressed you will sew along both of these sides giving you two finished edges.
 Now that you have the two side seams sewn, turn the fabric right side up and find the center of the fabric. Measure 9" in both direction from the center (this would be for an 18" pillow, adjust according to your pillow size) and fold the fabric so right sides are together. Iron each folded edge flat. Pin the top raw edges together and then the bottom raw edges together.
Sew a 1/2" seam along the top and bottom (top and bottom being the sides that have the raw edges) of the pillow cover. I like to backstich at each end of the seam to reinforce the corners of the cover. You're almost done, just a few more simple steps. Clip all four corners being careful not to cut through your seam. This will create sharper corners when you turn the cover right side out.

Flip the cover right side out and iron all four sides. I normally buy my pillow inserts at Ikea because they cost about $3 but you could also use a old pillow that you just plain don't like anymore. Here's a shot of my finished pillow. Hope you find these instructions easy to follow and give it a try yourself.
 Photo credits: Me!
Awesome idea!!! I have the same tablecloth and I don't currently have a use for it...until now! Thanks so much for the link to your blog. You have a great voice and I can't wait to keep reading.
ReplyDeleteI just used this tutorial to sew a pillow cover for my sofa.. love love love it! It was really easy to follow and took me about 25 minutes to do one pillow.. the impact to the room is huge. Thank you so much!
ReplyDeleteLove it! I just sewed my first pillow cover for some sofa pillows in about 25 minutes using these easy to follow instructions and it made a huge impact in our living room. Thank you so much!
ReplyDeleteGreat to hear you had success Jen. Funny that you found this tutorial as I created it in 2008. I should post an update with a few techniques I've learned.
DeleteIt would be great if you posted any tips--I am getting ready to use your tutorial/pattern on some outdoor cushions for my bench. It is beautifully written, btw. Laurie
Delete